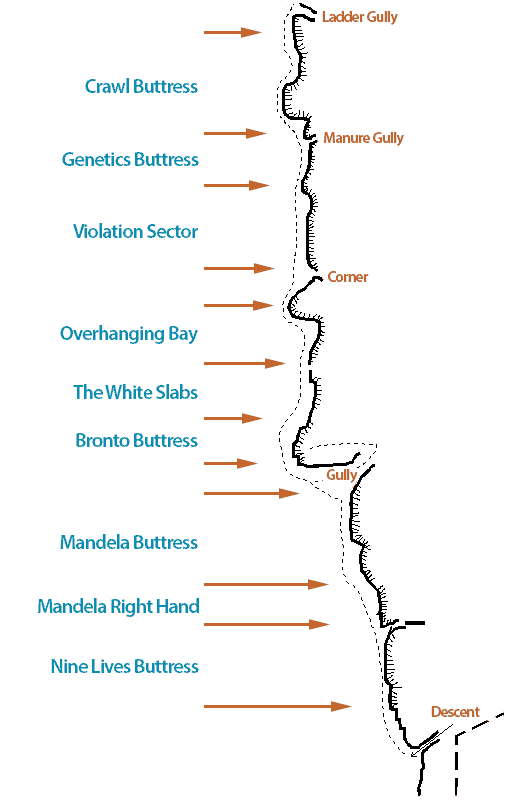
Escarpment Layout
 Well you’ve finally arrived by whatever access route and you’re wondering what to expect:
The crags are easily divided by two main section with the Escarpment perhaps being the baby brother to the main Crag. This is in no way detrimental to the Escarpment as with the passage of time since its development it is the Escarpment that has remained most popular with climbers. This is probably more due to its size and less imposing atmosphere than anything else, together of course with its very easy access making it ideal as an evening venue. But what can you expect?
Well, throughout its entire length, the escarpment never exceeds 18m in height and for most of its length the routes are in the 10m - 12m bracket. Short technical walls punctuated with bulges, overlaps and roofs are commonplace in its central section whilst on the fringes, most notably Mandela Buttress and Crawl Buttress, steep walls abound with some excellent technical face climbing.
As to the grades, well the majority of the routes here are in the E1-E5 grade but climbers operating in the VS/HVS category should not be deterred. sections of the escarpment have a number of very worthwhile routes of this grade and climbers wishing to push their standard further need only look nearby as that first E1 may well be within spitting distance.
A final word on protection. Most of the routes here have some form of fixed protection and many of the routes are complete sport routes. Other useful forms of protection include that large Friend for the dreaded break (and for belaying!) and a chunky rack of wires