Blue Yonder topo
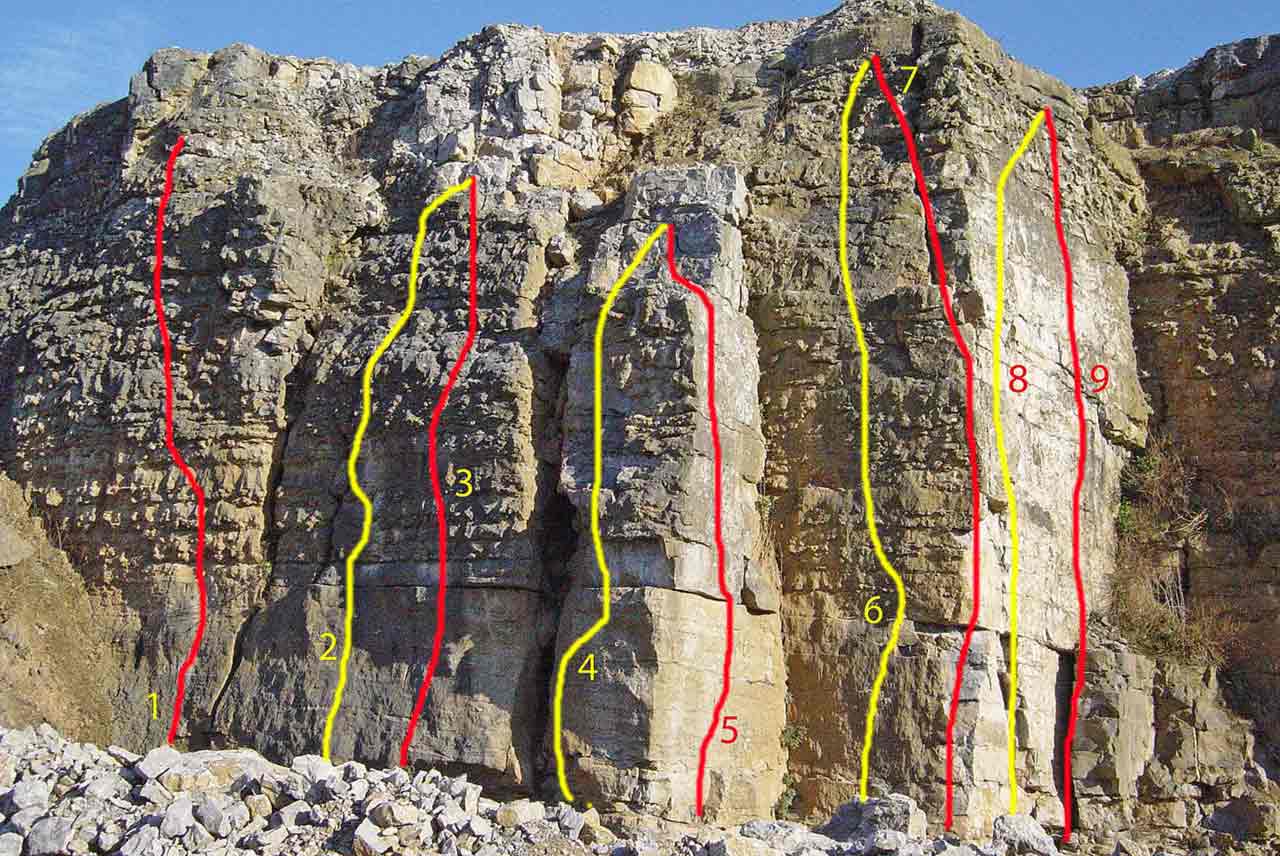
1. Wild Blue Yonder (6a+) ★
Bubbly wall with tricky start. Trend leftwards from there.
2. Look Over Yonder (5)
Short wall with wide crack beginning with leap of faith from block.
3. Snap to It (6b)
Difficult start right of block. Very pleasant above, though short.
4. Snap Off It (6a)
Pillar with tricky start via left arête. Poor.
5. Yonder Crisis (6b+) ★
Left side of corner with pleasant but fingery moves.
6. Help, Help me Yonder (6a+) ★
Right wall of corner on bobbles and protrusions. Slowly improving.
7. To Catch a Thief or Two (6b)
Right arête of slim wall with fingery pulls past small overlap.
8. Or Three (6b+)
Crackline just right of arête. Belay up and right
9. On Higher Perches (7a)
Wall above perched block.
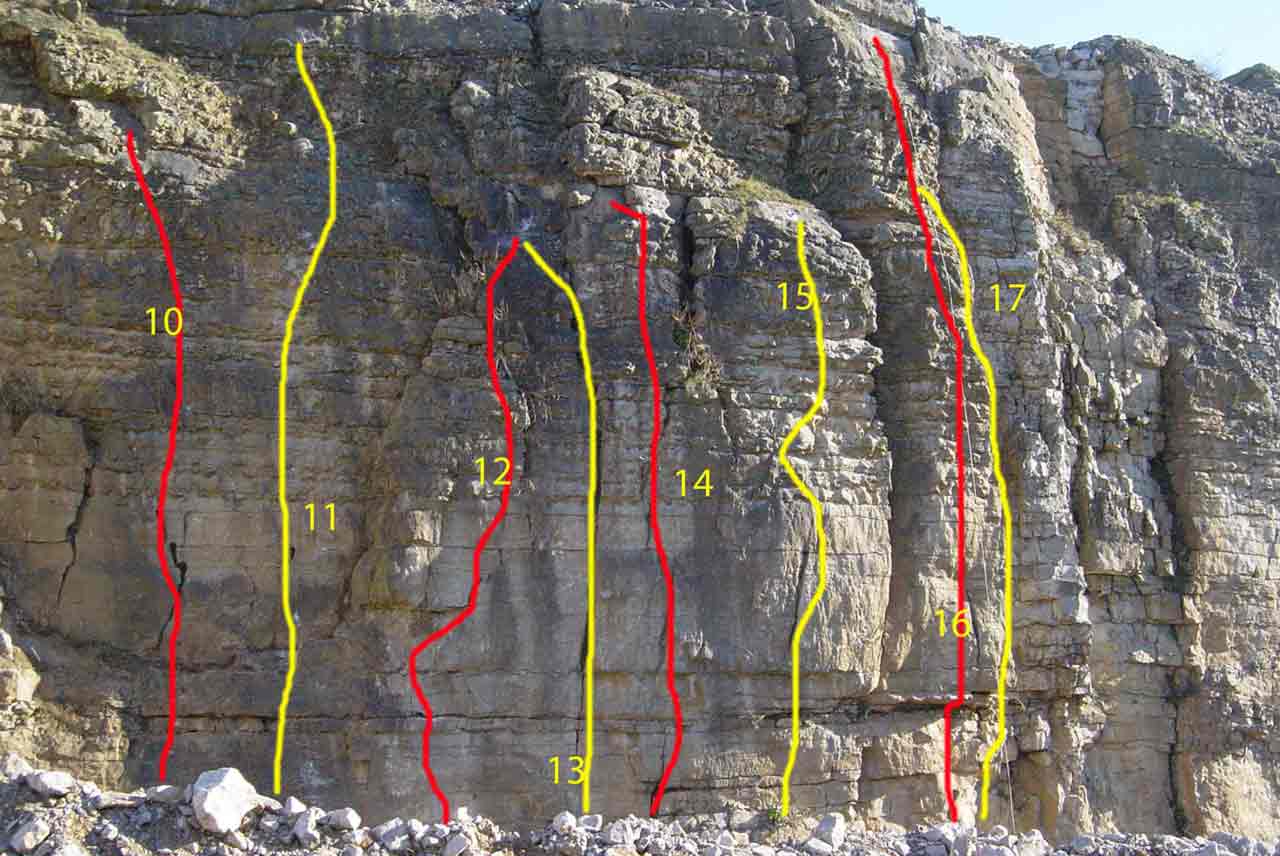
10. In the Trenches (6a+) ★
Easy wall with mantelshelf to ledge, then fine bobbly wall above.
11. Stench in the Trench (6b) ★
Thin crack to ledge then excellent upper wall. Care with finale.
12. Ditch the Bitch (6c+) ★
The grey wall with fingery moves up and rightwards to a flake crack.
13. Wench Warfare (6a)
The straight crackline gained via a short wall.
14. Jagged Edge (6a+) ★
Jagged crackline gained via short wall and finished via pillar.
15. Raggamuffin (6b+) ★
Fine short crack to right, gained via steep wall and finished direct.
16. Anything Can Happen (6b+) ★*
The prominent hanging pillar complete with overlap, crack and ‘monkey up a stick’ climbing above. Excellent.
17. Anything et Al (6b+) ★
Right arête of pillar gained through overlap.
18. Make Trouble in Rubble (6c)
Straight up wall to right. Just off photo.
19. Slinky Minky (6b+)
Left arête of prominent pillar down to the arête. Surprisingly good. Not on photo
20. Minky Toy (6c+)
Front face of pillar with difficult move through Overlap. Not on photo